Category Archives: Desserts

What is 10 fl oz when it’s at home?

Well, it took me a few months of long, hard procrastination, but I have finally done it!

This blog now has a new page with conversion tables for weights, measurements and oven temperatures. I hope many of you find it useful!

I would like to thank Delia for kindly giving me the permission to use data from her website. Actually, she didn’t give me permission as such, mostly because I haven’t asked. But I figured it would be ok if I gave her the credit, which I did.

This amazing new page can be found here. Alternatively, follow the link at the top of the page.


19 Comments

Filed under Bakes, Cakes, Desserts, Introduction, Mains, Uncategorized

White Chocolate and Orange Cookies

image

I have made several versions of these cookies over the past few months, changing the type of chocolate used, adding different types of nuts etc., and they always come out tasting great. Always.

So, what is the secret, you might ask? What guarantees perfect cookies every time? The answer is actually pretty simple, although some of you might not like it. The secret to an amazing cookie is an equal ratio of butter and sugar, and the two combined should weigh more than the flour. In other words, sugar and fat taste great. It is hardly breaking news, but it still remains true!


You will need (for 20 cookies):

125 g caster sugar

125 g brown sugar

250 g butter, softened

2 pinches bicarbonate of soda

2 eggs

400 g plain flour

200 g good quality white chocolate, chopped

zest 1 orange, thinly cut

Method:

Mix the butter and sugars thoroughly, until light and fluffy. Add the eggs one by one, beating well inbetween each addition.

Add the flour and bicard gradually, mixing well, then fold in the chocolate and zest. Cover the bowl with cling film and refrigerate for 1h.

Preheat the oven to 200ºC/fan 190ºC/ gas 6. Line two baking sheets with baking paper.

Divide the dough into 4 equal parts, roll each into a log, and cut each log into 5 roughly equal slices. Shape each slice into a little ball, and arrange these balls onto the prepared trays, squashing them a little as you go.

Bake for 9-10 min until lightly golden on the edges and still soft in the centre. Cool on a wire rack.

13 Comments

Filed under Bakes, Biscuits, Breakfast, Cakes, Desserts

Let’s Start 2013 In Style: Chocolate Orange Tart

image

If you want to impress the in-laws, or your best friend, next time they come for dinner, but you are not sure what to make, read on…

When I first produced this tart at the end of a meal, it was greeted with “ooohs” and “aaahs” and guests saying that really, I shouldn’t have gone to so much trouble, it looked fabulous, etc. In this situation, and regardless of how many hours you have been slaving away in the kitchen, social etiquette demands that your response should be along the lines of: ” oh, it was no trouble at all, it is actually very easy to make, really!”.  Which is pretty much what I said to my guests that day; but you know what? I wasn’t even lying!

This tart is really easy to make. The filling just needs mixing before baking, so no risk of curdling egg yolks while trying to make a custard-based filling. The pastry demands a little bit more care, as it is closer to a cookie dough than to traditional pastry, but as long as you keep it nice and chilled it should behave obediently enough.

I have borrowed the recipe for the pastry from Jamie Oliver’s “Fifteen Chocolate Tart” recipe. I love this chocolate tart more than words can express, but as I am still in a bit of a post-holiday chocolate hangover, I decided to go for something a bit lighter and fresher than chocolate on chocolate. I have evolved the filling from a lemon tart recipe I copied out years ago; I obviously replaced the lemon with oranges, upped the juice content a bit and added zest for a stronger citrus flavour.

The chocolate decoration is just there to make it look a bit fancier (and it works!), I just wish I had a steadier hand when wielding a piping bag; the picture below is proof that I am no artist… 🙂  New resolution for 2013: practice my piping.

image

You will need (for 6 to 8 people):

For the pastry:
325g unsalted butter
225g caster sugar
Pinch salt
565g plain flour
Zest of 1 orange, finely grated
3 large eggs
65g cocoa powder

For the filling:
5 eggs
140g caster sugar
150 ml double cream
100 ml freshly squeezed orange juice (from about 1 1/2 oranges)
Zest of 1 orange, finely grated.

Optional: 50g dark chocolate, for decorating.

Method:

Butter a 28 cm Ø loose-bottomed tart tin.

In a large bowl, cream together the butter, sugar and salt, then fold in the flour, eggs, zest, and cocoa powder (you can do this by hand or with a food processor, but this makes quite a lot of pastry so your food processor needs to be a large one).

When the mixture looks like coarse breadcrumbs, gently bring it together until you have a ball  of dough. Do not knead it too much or it will become chewy. Flour the dough lightly, then wrap in cling film and refrigerate for at least an hour.

Remove from the fridge, roll out to the desired size, and carefully line your tart tin with it (any tears can be easily repaired by patching up with offcuts, lightly brushed with water then pressed down over the cracks). Put the lined tin in the freezer for 30 min.

Preheat the oven to 200ºC/ fan 180ºC/ Gas 6. Bake the pastry for around 12-15 minutes or until it is firm and almost biscuit-like, then remove it and leave to cool while you make the filling.

Turn the oven down to 160ºC/fan 140ºC/Gas 3.

To make the filling, beat all the ingredients, except for the zest, together. Sieve the mixture into a large jug, then stir in the zest.

Pull the middle shelf half-out of the oven, and place the tart tin on it. Carefully pour the filling into the pastry case, taking care that it stops a few millimetres below the edge of the pastry. Gently push the shelf back in. Bake for 30-35 min until just set.

Leave to cool to room temperature, then carefully remove the tart from the tin.

For the decoration, melt the chocolate in a heatproof bowl placed over a pan of simmering water (take care that the bowl doesn’t touch the water). Immediately transfer the melted chocolate to a piping bag fitted with a nozzle with a small, plain opening, and pipe criss-crossing patterns onto the tart. Refrigerate until ready to serve.

6 Comments

Filed under Bakes, Christmas, Desserts, Sweet Tarts

The Post I Never Thought I Would Write: Christmas Pudding

Having grown up in France, Christmas pudding was an alien concept to me until a few years ago. I had heard tales of steamed puddings made months in advance, and containing some sort of animal fat, but I  just assumed it was one of those popular stories that have very little to do with reality. After all, us Frenchies are always ready to believe that our British friends would eat all sorts of weird concoctions… (Which is a bit ironic when you consider that we eat snails and frogs’ legs).

As it turns out though, the legend was true. I started coming across Christmas pudding recipes in all the food magazines I was buying during the run-up to my first Christmas in England. And there it was, among the numerous ingredients listed: shredded beef suet.  I won’t lie to you: my first reaction was made up of equal parts of disbelief and disgust. There was no way I was ever eating that!

hen one day, someone offered me a mince pie (another recipe I had never heard of before, more on this in a future post). I ate it, liked it, then discovered I had just consumed suet. And I had enjoyed it. This was when I decided that I would give Christmas pudding a go. But I wasn’t going to buy it; oh no, not I! I was going to make it. So off I went to the shops, I purchased a pudding basin, the dreaded shredded suet, and some brandy and set to work.

What I produced looked and smelt ok, but I had to wait a few weeks for Christmas to come round before I could taste it. In the meantime, I dutifully “fed” my pudding with more brandy at regular intervals, reasoning that even if it turned out to be revolting, it might at least get me a little bit tipsy…

The long-awaited day finally arrived, I reheated my pudding, and served it (not flambé, as I couldn’t find any matches). I took my first bite, and was instantly hooked. It was warm, rich, moist, had a lovely flavour, and yes, you could definitely taste the brandy. I did not tire of the leftovers either, in fact I was rather disappointed when we eventually finished it. Which is why I would encourage anyone to have a go at making this, especially if like me, you have a pre-conceived idea that it will be revolting.

 This is a James Martin recipe which I copied out from somewhere a few years ago (very, very vague credits, but credits nonetheless); I like it because of the ginger, which gives it a lovely, warm flavour. Enjoy!

Post-Christmas edit: I just thought I would let you all know that my family loved this pudding. Even my very sceptical Dad grudgingly admitted that it was “rather nice”. Not bad…

You will need (for 1×1.5l pudding):

175 g sultanas
175 g currants
70 g dried figs, chopped
50 g mixed peel
45 g glacé cherries, halved
50 g dried apricots, chopped
100 ml brandy
50 g stem ginger, chopped + 2 tbsp of their syrup
1 apple, grated
Juice + zest 1 orange
3 large eggs, beaten
125 g shredded suet
125 g fresh, white breadcrumbs
175 g light muscovado sugar
90 g self-raising flour
1/2 tsp mixed spice
Butter, for greasing

Method:

In a bowl, soak the sultanas, currants, figs, mixed peel, cherries and apricots with the brandy overnight.image

The following day, mix in a large bowl the ginger, syrup, apple, orange juice and zest, eggs, suet, breadcrumbs, sugar, flour and mixed spice. Mix in the soaked fruit.

Butter the pudding basin, fill with the mixture. Smooth the top and cover with a circle of greaseproof paper. Cover with a sheet of foil with a folded pleat down the centre, and secure it by tying it tightly with some string. Tie a loop of string on either side of the basin to act as handles.
image
image

Stand the basin on top of an upturned saucer placed in a deep, large pan. Pour boiling water in the pan so it comes about a 1/3 of the way up. Cover and steam over a gentle heat for 5h, topping up with more water if necessary.

Cool the pudding in the pan, then remove foil and paper. Cover with cling film and store in a cool, dry place. Every so often, prick the surface with a skewer and drizzle a bit more brandy.

To reheat, steam for an hour or so.

To serve, heat up about 50 ml of brandy, pour over the pudding and light straight away with a match. Let the flames die down, then serve.

19 Comments

Filed under Cakes, Christmas, Desserts

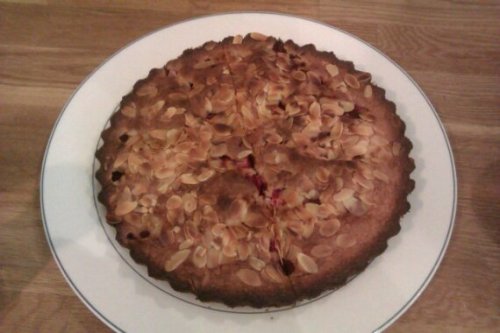
Gone in 60 Seconds: Raspberry and Almond Cake

image

Disclaimer: this post has nothing to do with stealing cars. If this is what you were looking for, try here instead. What this post is actually about, is cake, and how fast it disappears from the plate (just so we are clear).

I made this cake for my friend J. and her little girl E. who came to visit at Greedy Frog Towers today. I fancied a raspberry/almond combo, but I wasn’t really in the mood for a Bakewell tart so I came up with this instead.

We had some with a cup of tea when she arrived, then a little bit more as a dessert after lunch. It sounds like there should still be about half a cake, right? Wrong! One small slice is all that is left. Bearing in mind that Mr Greedy Frog only had one slice, this means that J. and me pretty much ate a whole cake between us…

Am I feeling guilty? Not one bit. Do I wish I had made two cakes instead of one? Hell, yes!

You will need:

100 g butter, softened
150 g unrefined caster sugar
3 eggs
75g plain flour
75g ground almonds
1 large handful frozen raspberries
30 g flaked almonds

Method:

Preheat the oven to 210ºC/ fan 190ºC/ th 7. Butter a Ø26 cm cake tin.

Beat the butter and sugar together until pale and fluffy. Add the eggs one by one, mixing thoroughly inbetween each addition. Add the flour, then the ground almonds and mix until smooth. Add the raspberries and mix gently (you don’t want to beak them up too much).

Pour the batter into the prepared tin, scatter the flaked almonds on top and bake for 20/25 min or until nice and golden on top, and a skewer inserted into the middle comes out clean.image

17 Comments

Filed under Bakes, Cakes, Desserts

How to Make Friends and Influence People: Dark Chocolate and Raspberry Cake

image

Every so often, I find myself in a situation where I badly need a favour from someone. I tend to feel very guilty asking for favours, though; I am always worried of imposing on people. So I usually come up with a way of returning said favour, and this normally involves cake.

There are also times, like now, when I want to thank someone with more than words. And this, too, normally involves cake. In this instance, I wanted to repay my long-suffering work colleagues for their kindness. I applied for a promotion recently, and had an interview which went well, but despite the good feedback I received, the position was given to someone else. I was obviously very disappointed, and I must have looked rather upset because all my lovely colleagues have done since I found out, is try and cheer me up. They even went as far as saying that they were delighted that I didn’t get the job because it meant I wouldn’t have to leave the office, and would still be working with them.

I suspect that this statement was partially motivated by the fact that I do often bring cake to work, especially as I am always in need of testers when I am working on a new recipe. But I also know that they meant it. So, thanks guys, I am really glad to be working with all of you.

If, like me, you rely on cake to do the talking at times, then this is a great recipe to have up your sleeve. It is quick and easy to make, the ingredients are likely to be in your kitchen already, and it can convey a message pretty well.

You will need:

200g good quality dark chocolate
4 eggs
Pinch salt
150 g caster sugar
50 g plain flour
150g butter, at room temperature, + extra for the tin
A handful raspberries (frozen are fine)

Icing sugar, to serve.

Method:

If you are using frozen raspberries, take them out of the freezer and lay them out on a sheet of kitchen paper.

Preheat your oven to 200ºC/ fan 180ºC/ gas 6. Butter a 26 cmØ cake tin, or deep tart tin (I use a fluted one, but a straight-edged one is fine too).

Break up the chocolate into even-sized chunks, place into a heatproof bowl. Find a pan on which the bowl can sit securely, with plenty of space between the bottom of the bowl and the bottom of the pan. Bring water to the boil in the pan, and place the chocolate on top, taking care that the bowl isn’t touching the water. Turn the heat down to a simmer and leave to melt for a few minutes without stirring.

Meanwhile, separate the eggs. Add a pinch of salt to the whites and whisk to stiff peaks.

Mix the butter and sugar until combined, but do not overmix (this will give the cake a fudge-like texture). Add the melted chocolate and mix thoroughly. add the egg yolks one by one, mixing all the while.

Add the flour and stir until incorporated. Add the egg whites a bit at a time, mixing delicately to avoid losing any of the air trapped inside them. Pour the batter into the prepared tin, scatter the raspberries on top (it doesn’t matter if they are still partially frozen), and press down gently on the fruit so it sinks into the batter a bit.

Bake for 20-25 min, or until a skewer inserted into the middle comes out clean. Cool in the tin for 5 min, then turn out onto a wire rack. When completely cool, sprinkle with icing sugar.

18 Comments

Filed under Bakes, Cakes, Desserts

The Ultimate Idiotproof Dessert: Vanilla Crème Caramel

image

This recipe is stupidly easy, and it has the added advantage of producing a rather good-looking dessert. No specific skill is required: if you can mix ingredients, you can make this crème caramel.

“But what about the caramel?” you might ask, “isn’t it a bit tricky to make? Won’t I end up with a crystallised, burnt-out glue solidified in my pan?” (not that this has ever happened to me; ahem).

Well, fear not, my fellow foodies, as I am about to reveal the secret ingredient which will assuage all your caramel-related fears: liquid glucose.

Now, I am not normally one for cheffy tricks, but this one blew me away: who would have thought that a substance that is basically sugar could transform so radically the texture of, well, cooked sugar? 

I added some to my caramel just as the last bits of sugar were starting to melt; the mixture bubbled up rather fiercely, but when the volcanic activity died down I was left with the smoothest, silkiest, most gorgeously coppery caramel I have ever made. Not a single sugar crystal in sight! So if you have ever had any caramel disasters, I would urge you to try liquid glucose; I, for one, am a convert!

I use sweetened condensed milk here as it is a convenient shortcut; I didn’t find this out all by myself though, I borrowed the idea from a recipe by Bill Granger.

You will need (for 6):

30 g liquid glucose (optional, see above)
150 g caster sugar (unrefined if possible)
1 x 400 g tin sweetened condensed milk
5 eggs
1 litre milk
1 tbsp vanilla extract

Method:

Preheat the oven to 180°C/fan 160ºC/ Gas 4.

In a wide, non-stick frying pan, heat up the sugar on a medium to high heat until melted. Add the liquid glucose if using (see intro). Pour the caramel into a 24 cm ovenproof dish (not a metallic one, ceramic or Pyrex are ideal).

In a large bowl, whisk the eggs then add the condensed milk, the milk, and vanilla extract. Strain the mixture into the prepared dish.

Carefully place the dish in a deep roasting tin, and pour boiling water into the roasting tin until it reaches halfway up the sides of the dish. Cover with foil, and bake for about an hour, or until set but still wobbly in the middle.

Take out of the water bath, cool completely then refrigerate for at least 4h (or preferably overnight).

To serve, carefully run a knife between the crème and the sides of the dish, put a large serving plate over it, then while firmly holding the plate in place, invert the dish onto it.

Enjoy!

6 Comments

Filed under Bakes, Desserts

Tart Up Your Cake: Cake Tatin

image

I love Tarte Tatin. I think it is just about the best apple dessert in the known universe. I don’t know about you, but there is something about apples and caramel that makes me go a bit weak at the knees.

I also happen to be quite partial to cake, as you may have noticed from some of my previous posts. So it is only natural that I would try and come up with what would be the love child of saucy Ms Tatin and naughty Mr Cake.

This recipe is the result of a lot of trial and error. The trick was to figure out how to incorporate the caramel element into an apple cake.

I knew I couldn’t use a similar technique to Tarte Tatin: lining the cake tin with caramel wouldn’t work, as a cake needs baking for longer than a tart, and the result would just be a burnt, blackened mess.

I toyed with the idea of filling the cooled cake with some toffee cream, but this would just be a layer cake, and although probably delicious, this wasn’t what I was going for.

An attempt at caramelising the top of the cake at the end of the baking time wasn’t very successful: it looked good, but the taste wasn’t what I had in mind.

I realised that I needed the caramel to be baked in somehow, so the apples would take on the toffee flavour, like in Tarte Tatin. But I was a bit stuck as to how exactly I could achieve this.

And then I came across a recipe by Edd Kimber, for salted caramel brownies, where a salted caramel filling is baked between two layers of brownie dough.

I knew it wouldn’t work in quite the same way with apple cake, as the density of the batter is different to the one of brownie batter, and the caramel filling would end up mixing with the bottom layer during baking. And, guess what? This was exactly what I needed!

The next trial was a resounding success, and the addition of the butter and almond glaze ensured the top of the cake stayed moist and golden. So, with thanks to Mr Kimber, here is the recipe!

You will need:

For the salted caramel:
175g caster sugar (unrefined if possible)
A large pinch of sea salt flakes
150 ml double cream
10 g unsalted butter, softened.

For the cake:
2 tsp vanilla extract
4 apples
6 eggs of about 60 g each
360 g self-raising flour (or the same weight as the eggs; the same goes for the rest of the ingredients)
360 g caster sugar
360 g butter, softened

For the glaze:
100 g butter
3 tbsp sugar
50 g ground almonds

Method:

Make the caramel: in a large, non-stick frying pan, heat up the sugar over a medium heat until it melts.

image

Try and avoid stirring at this stage as it would crystallise. Keep a close eye on it, and as soon as it takes on a dark copper colour, take it off the heat and add the salt and half the cream. Be very careful as it will bubble up fiercely, and caramel burns are very painful!

When the mixture has settled a bit, add the rest of the cream and the butter. (If your caramel is lumpy, put it back on a low heat and stir until smooth). Cool in a glass jug or bowl.

Peel the apples, then dice two of them and slice the other two.
image

Preheat the oven to 190 C/ fan180 C/ gas 5-6. Butter a rectangular cake tin of 31 x 18 cm, line with baking paper, then lightly butter the baking paper (a tin with a removable bottom, or even better, with removable sides is ideal here; I use a Silverwood multi-size square tin which works brilliantly Alan Silverwood).

Make the cake batter: in a large bowl, beat the butter and sugar until light and fluffy. Add the vanilla extract, then the eggs one by one, mixing thoroughly between each addition. Add half of the flour, mix thoroughly, then add the other half.

image
Assemble the cake: Pour half the batter into the tin, then scatter the apple cubes on top, and press lightly with your fingers to make them “sink” a bit.

image

Pour the caramel over the cake batter, being careful to avoid the sides. Try and spread it as evenly as you can, but it doesn’t need to be too neat.

image

Now pour the rest of the batter over this, make sure you cover the caramel completely. Decorate the top with the apple slices, and push them in a bit.

image

Put the cake tin into your preheated oven, and prepare the glaze. Gently melt the butter, then mix in the sugar and ground almonds. When the cake has been baking for 20 min, quickly pull it out of the oven, spread the glaze all over, and put in back into the oven. Do this as quickly as you can to avoid losing too much heat.

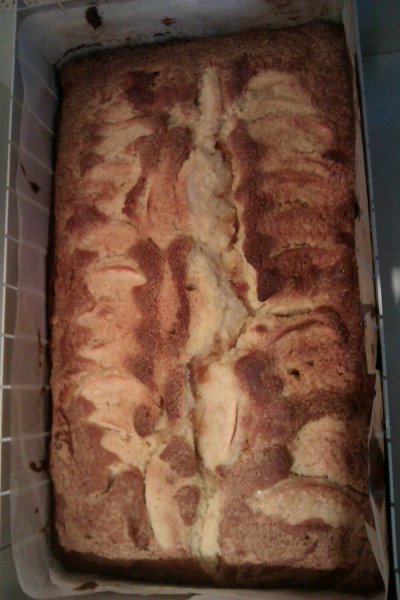
Leave the cake in for another 30 to 40 min (so 50 min to 1h in total), or until golden brown on top and a skewer inserted into the middle comes out dry. If you think your cake is browning too quickly, cover the top with foil and continue baking.

image

Cool in the tin for at least 20 min, then carefully remove it from the tin, remove the paper, and cool on a rack. Be very careful as this cake is very moist, and therefore quite fragile!

6 Comments

Filed under Bakes, Cakes, Desserts

Mr Greedy Frog’s Birthday Cheesecake (Peach, Honey and Vanilla Cheesecake)

image

It is Mr Greedy Frog’s birthday. I asked him a few days ago if he had any request for his birthday cake, and the answer was immediate: Mr Greedy Frog wanted cheesecake.

To be honest, I don’t know why I bothered asking. Cheesecake is a favourite of his, he ALWAYS orders it if it is on the menu when we eat out, and when I bake one at home, it disappears faster than you can say “cream cheese”.

I fancied something summery, so opted for peaches, and I had some lovely orange blossom honey which I thought would taste great with the fruit. You can of course use almost any type of honey in this recipe, although I would probably avoid strong-flavoured ones like eucalyptus.

You will need:

For the cheesecake:
150 g biscuits (I used oaty ones, but you can use any plain biscuits you like)
70 g butter + extra for the tin
600 g cream cheese
170 ml double cream
1 tsp vanilla extract
2 tbsp plain flour
150 g caster sugar
2 eggs + 1 yolk
1 peach
2 tbsp honey

For the peach glaze:
2 peaches
1 tbsp honey
1 tsp vanilla extract

Method:

Butter a 20 cm springform tin, line the bottom with baking paper, then butter again on top of the paper. Preheat the oven to 180 C/ fan 160 C/ gas 4.

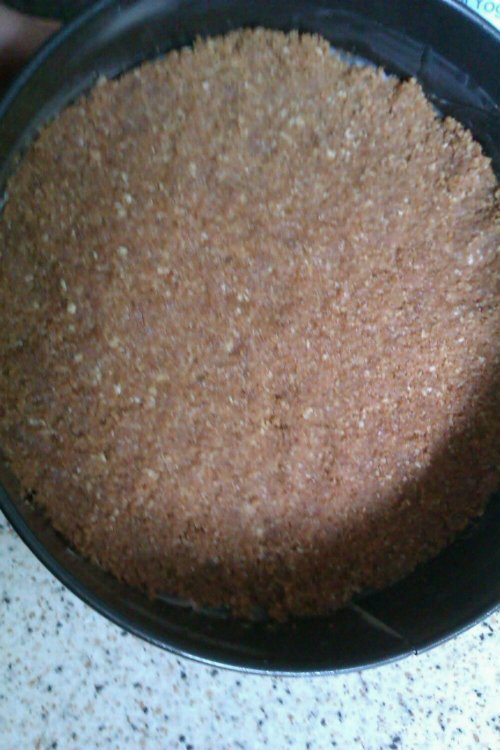
In a food processor, blitz the biscuits to fine crumbs. Gently melt the butter over a low heat, and mix with the biscuit crumbs.

Press with your hand into the prepared tin to create a base. Refrigerate until your filling is ready.image

In a large bowl, beat the cream cheese and cream together. Sieve the flour over the mixture, and whisk it in. Then add the sugar, vanilla and eggs, beating thoroughly.

Peel the peach, then chop into small pieces. Don’t make the pieces too big or they will sink to the bottom of the cheesecake. Stir into the cream cheese mixture, along with the honey.

Pour into the tin, and bake for 30 to 40 min, or until set and golden on top but still wobbly in the centre. When done, turn the oven off, leave the oven door slightly ajar, and leave to cool completely.*
image

Make the glaze: peel and dice the 2 peaches, and cook on a low heat with the honey and vanilla. It is ready when the fruit is breaking down slightly and the juices are starting to reduce.image

Pour the fruit and juices into a blender and pulse until smooth. Strain the purée to make sure it is nice and glossy, and reserve until the cheesecake has cooled down to room temperature.

Spread the glaze on top of the cheesecake, and refrigerate in the tin overnight. image

When ready to serve, carefully remove from the tin and discard the baking paper.
image

*cooling the cheesecake in the oven prevents cracks from forming on the surface. I didn’t do it this time, because I needed to use the oven for something else; and lo and behold, a crack appeared…

7 Comments

Filed under Bakes, Cakes, Desserts

If Al Pacino were a cake…(Chocolate Cake With A Crunchy Almond Crust)

image

This cake is quite a bit like Al Pacino: at first glance, it doesn’t look like much. You wouldn’t really notice it on a cake stall, next to all the cupcakes and layer cakes, all tarted up in their rainbow-coloured frosting and sprinkles.

This cake is what you would call the underdog. But take a bite, and you will realise that it is every bit as bad ass as the star of “Scarface”.

And this is where the comparison ends, because adjectives such as moist, delicious, or moreish wouldn’t really apply to Mr Pacino. But you get the idea.

The beauty of this cake is that you get the crunchy almonds on top, which contrast wonderfully with the soft chocolate cake.

You will need:

125 g dark chocolate (ideally at least 70% cocoa solids)
125 g unsalted butter, softened
125 g self-raising flour
250 g sugar
5 eggs
50 g flaked almonds
A few drops natural almond extract

Method:

Preheat your oven to 200 C/ fan 190 C/ gas 6. Butter a metal cake tin (I use a rectangular one of 31×18 cm), and scatter the flaked almonds over the bottom.image

Melt the chocolate, either in the microwave, or in a pan on a low heat, with a drop of milk. When melted, mix with the butter in a large bowl.

Add the egg yolks to the chocolate mixture, mix thoroughly, then add the sugar. Mix energetically for a few minutes, to ensure your cake is light and fluffy. Add the flour and the almond extract.

Whisk the egg whites to stiff peaks, and add gradually to the chocolate mixture, mixing very delicately.

Pour the batter into the prepared tin, and bake for 20 to 30 min or until a skewer inserted into the middle comes out clean (the cooking time will depend on the depth of your cake tin).image

Have a slice with a cup of tea or coffee. Then another one. And I guarantee you that you will want a slice for breakfast, too!

7 Comments

Filed under Bakes, Breakfast, Cakes, Desserts